Forging Project
Spring 2024
In my Manufacturing Processes class, I chose to design and forge a thread tapper hammer that I could use for leathercrafting. Since forging was not available at Tulane’s Makerspace and I was new to it, I decided to take a custom blacksmithing class with a local blacksmith in New Orleans, Olof Rolfsson, at Church Mouse Forge. Forging a hammer as my first blacksmithing project was quite ambitious, but I figured I might as well try it out, especially since I would have an experienced blacksmith at my side. After all, I believe the quickest way to learn something is by tackling the most difficult project first!
Here are a few images of the CAD model I wanted the hammer to resemble:


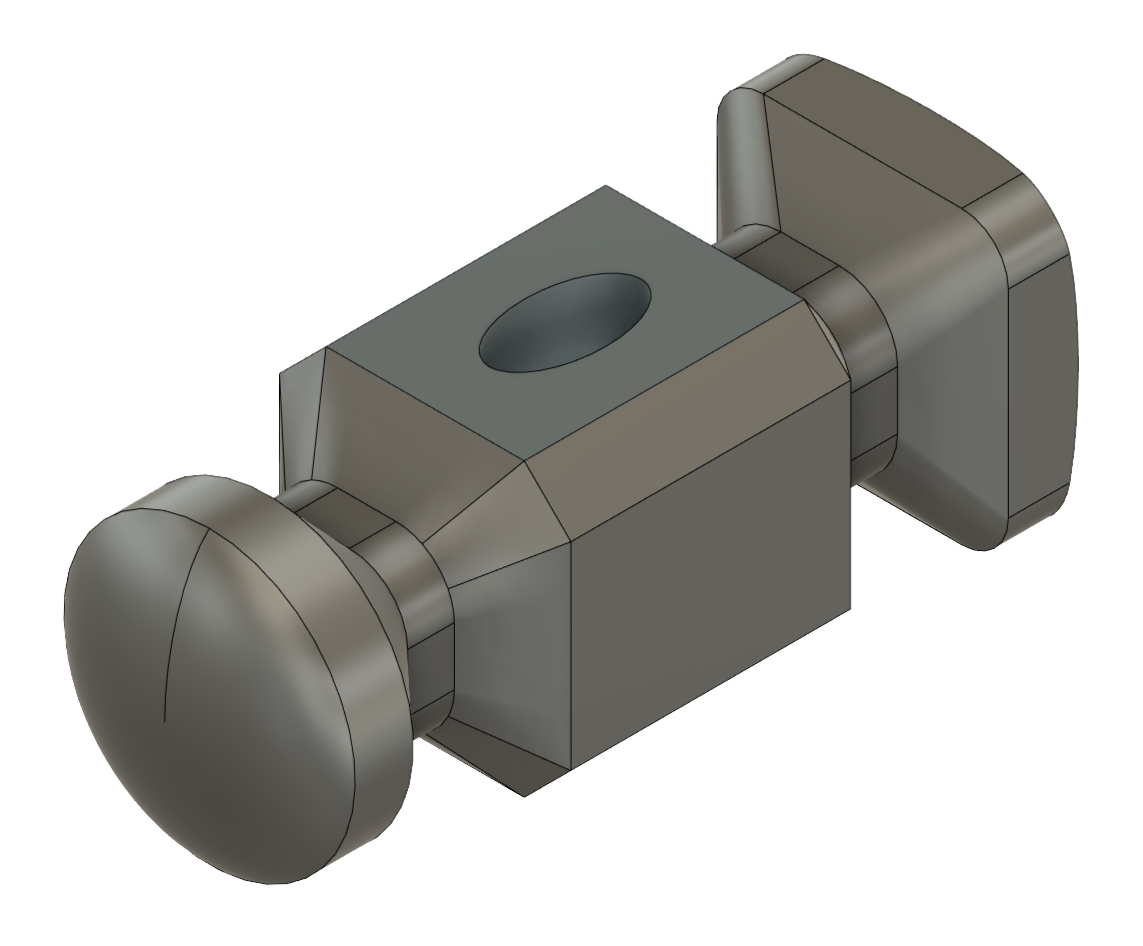
I knew we wouldn’t be able to forge the hammer to the exact dimensions and shape as my CAD model because of the tools available and the nature of forging itself, but we wanted to get the overall shape and size as similar as possible.
The Process
We started off with our stock of steel cut to size based off of the weight and dimensions that we wanted the final hammer to be. We put it in the forge to start the first heat, which would be the longest since we were starting from room temperature. Subsequent heats would be much quicker to get up to temperature since the steel would already be very hot. Once the steel matched the color of the inside of the forge, we knew the steel was as hot as it would get and we were ready to start using the power hammer.
I used tongs to hold the steel while operating the power hammer with my foot and I began to draw out the steel to the proper size and start forming the chamfers. This was a relatively slow process because I was not used to holding a 1.5 pound block of steel with giant tongs, and I was simultaneously getting used to the amount of pressure I needed to put on the pedal of the power hammer. I even dropped the billet a few times, but so did Olof, so we’re even :D
WARNING: Video volume may be loud.
WARNING: Video volume may be loud.
Once the general shape and the chamfers were formed, we used some calipers and a pointed chisel to mark the center of the body where we wanted the eye of the hammer to be. With some more help from the power hammer, we punched out the slug and used spring fullers to create the necks on each side of the hammer. We then rounded out one of the heads to make it circular, while keeping the other side square to resemble the CAD model.
Lastly, we quenched the hammer in water since it didn’t need a proper heat treatment, as it was only going to be used on leather and not on hard objects. As the finishing touch, I used a ceramic sanding belt to create the convex faces on each hammer head. I periodically changed the belt to increase the grit so I could get a smooth, polished finish on both heads.
All that was left to do was give the hammer a nice wax coating to protect it from rusting, and then install the handle with a wood wedge and metal wedge, then it was finished! Not too bad if I do say so myself :)


Overall, this was an exhilarating new challenge that allowed me to make one of my own leathercrafting tools that I will use for the rest of my life. I will definitely be back to do some more fun projects with Olof at Church Mouse Forge! Not to mention the awesome shop kitty that joined us :D